- Article published at:
- Article tag: How to
I have one rule for holiday gifting: if it can’t be put to work before the dishes are done, it’s not the gift. Thanksgiving is road trips, crowded kitchens, and the sacred art of managing leftovers. These Durbl pieces earn their keep the minute dessert is served—and again on Monday.
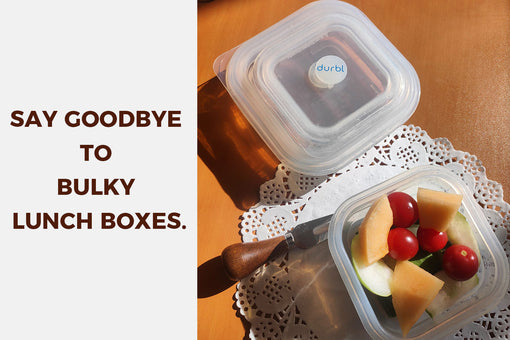
Silicone Collapsible Lunch Box — 600 ml (about 20 oz / 2.5 cups)
This is my “always bring one” container. It’s the perfect size for a slice of pumpkin pie plus a spoonful of stuffing—full but not crammed. After dinner, the lid clicks on with that satisfying snap, and it rides home in a tote without baptizing your coat in gravy. Back at the house, it folds down like a paperback and disappears in the cabinet. Two tiny pro tips from too many family dinners: let steamy food breathe for a minute before sealing, and press the lid on all four sides until you hear that little click. Do that and you’re golden.
Silicone Collapsible Lunch Box — 1200 ml (about 41 oz / 5 cups)
When there are more people than chairs, I reach for the 1200. On the table it passes as a low serving bowl—great for roasted veggies or a pile of dinner rolls. When everyone says “one last bite,” the lid goes on and it becomes tomorrow’s leftover box without a dish swap. Sunday night, give the base a gentle reheat and call it comfort. It’s the container that quietly removes steps: less transferring, fewer things to wash, faster cleanup.
Silicone Bags — Essentials Set (mixed everyday sizes)
These are the kitchen organizers that stop the chaos. They stand up on their own, zip tight, and somehow multiply in usefulness once the cooking starts. On the drive to Grandma’s, one bag gets trail mix, one cookies, one carrots. At the stove, another corrals garlic bulbs and herb bundles so the counter doesn’t look like a farmers market exploded. If you’re sealing something hot, just wait thirty seconds first—future-you will thank you.
Half-Gallon Silicone Bag (about 1.9 L / 64 oz / 8 cups)
The leftover MVP. Thanksgiving morning-after, all the turkey bones and veggie scraps go in, zip, then the whole thing lays flat in the freezer with a quick label: “Turkey Stock 11/28.” Midweek you break off a slab, drop it in a pot, and suddenly dinner tastes intentional. It also swallows the awkward stuff—half a pie, a head of romaine—and doesn’t leak under pressure. Be kind with anything sharp or bony and this bag will outlast your willpower around the dessert tray.
Silicone Bags — 5-Pack (family set, small→large mix)
For the households that like order. After dinner, line the bags up with a Sharpie on the table. People write their names and fill their own: turkey, mash, greens, pie, rolls—done. The living room conversation keeps going while the kitchen basically cleans itself. One practical note from experience: if you loan a favorite bag to a cousin, put a tiny colored dot on the corner so it finds its way home.
Simple Gift Combos (so you don’t overthink it)
● Road-Trip Ready: 600 ml + 3-Pack — snacks now, lunch tomorrow, no spills.● Host’s Best Friend: 1200 ml + 5-Pack — serve at dinner, self-serve leftovers after.● Leftover Kit: 1200 ml + Half-Gallon — table to fridge to freezer without extra dishes.And tuck in a card that says: “Thanks for feeding us. Here’s something that keeps feeding you later.”
Real Thanksgiving Moments (you’ll recognize these)
● You promised “just one slice,” left with a sampler plate—the 600 ml keeps it tidy and your passenger seat clean.● The table turns into a cleanup line—the 1200 ml goes from serving bowl to sealed leftover box in three seconds.● Sunday night, there’s a flat, labeled Half-Gallon in the freezer. You feel unreasonably accomplished.
Quick Capacity Cheat Sheet
● 600 ml ≈ 20 oz / 2.5 cups — pie slice + side, or a full next-day lunch● 1200 ml ≈ 41 oz / 5 cups — family-size sides, serve-then-store● Half-Gallon Bag ≈ 1.9 L / 64 oz / 8 cups — stock, half a pie, big prep● 3-Pack / 5-Pack — mixed sizes to cover snacks → sides → bulky bits
If you’re only choosing one, start with the 600 ml fold-flat. Add the 1200 ml if you’re feeding a crowd. If leftovers are your love language, the Half-Gallon plus a 3- or 5-Pack will make this whole long weekend easier—and a lot less wasteful.
Learn More