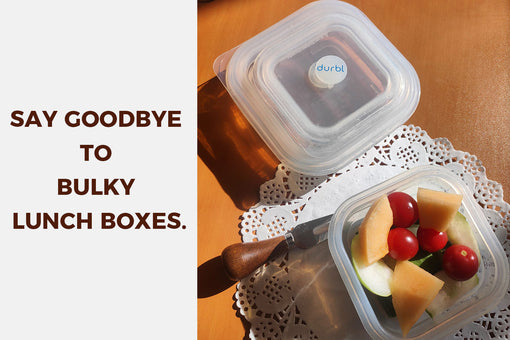
A quick microwave egg routine for busy mornings or light lunches. Crack eggs into a Durbl 400ml container, add simple fridge ingredients, vent the lid, and cook in short bursts for an easy warm meal.
A practical Thanksgiving gift guide for people who actually use their kitchen gear. From fold-flat containers to silicone bags, these Durbl pieces help pack road-trip snacks, serve sides, store leftovers, and make post-holiday cleanup easier.
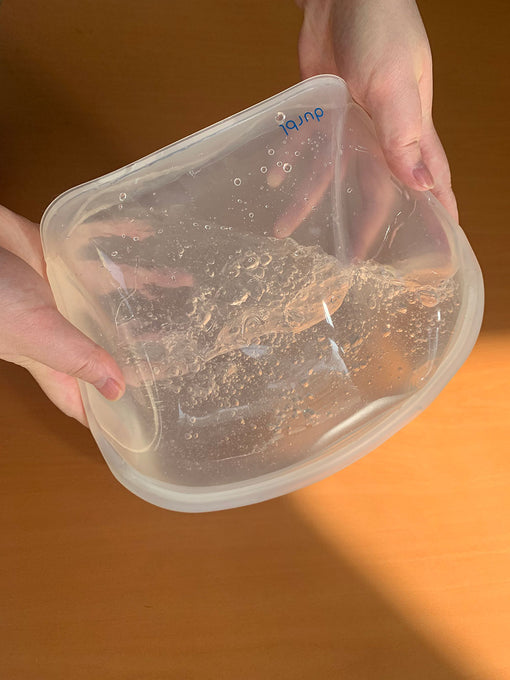
If you're striving for a more sustainable lifestyle, finding genuinely useful eco-friendly alternatives can be tougher than expected. But we're here to recommend one: Durbl Bag. We tested them by packing, washing, microwaving, freezing, and boiling them to see if they hold up. After all that, we can confidently say we're never buying another plastic bag again.Durbl bags are reusable bags crafted from platinum-grade silicone, known for its top-notch quality. They're BPA free, BPS, and phthalate-free, meeting both FDA and EU standards for food safety. This ensures you can confidently use Durbl bags for packing lunches, storing leftovers, and more, without concerns of plastic or chemical leakage, as they're safe for the freezer, microwave, oven, and boiling water.
Benefits of using Durbl bags
The versatility of Durbl bags knows no bounds. From freezing leftovers to microwaving popcorn, reheating leftovers in the oven, and even sous vide cooking a perfect steak, the options are limitless. They outshine traditional plastic bags, offering safety, versatility, and overall superiority. How to close the Durbl bag?Durbl bags feature a double-sided strip seal design, ensuring excellent sealing to keep any food and leftovers fresh. You can test it by filling the half-gallon bag with water, then turning it upside down and shaking it, believing that not a single drop of water will leak out. Some handy tips:
Pinch along the protruding position of the seal
Pinch along the upper part of the seal (pay attention to your action, buckle and then pinch)
As you pinch firmly, you should hear a sound "kapa".
After sealing, check the closure; the two sides of the bag should fit tightly together. Then, you can store the bag in the fridge, confident it will keep your food fresh for a long time.
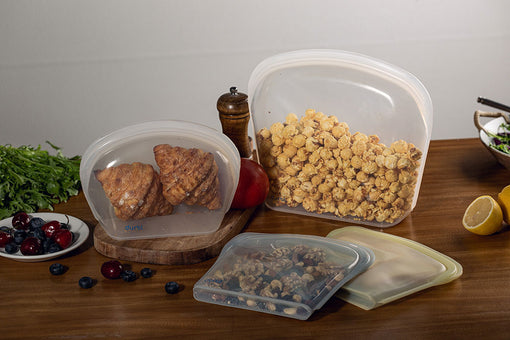
Durbl comes in various shapes and sizes, far more than just a replacement for plastic bags. They can meet many different needs, truly a highly versatile tool worth having in your kitchen.
在 Instagram 查看这篇帖子
Durbl Reusable Silicone Bags (@thisisdurbl) 分享的帖子
This Valentine's Day, elevate your gift-giving with Durbl silicone bags. Create unique, eco-friendly presents like a "Treasure of Love" map, "Stress-Buster" squeeze balls, and a "Starry Night Picnic" kit. Each Durbl bag idea carries heartfelt messages and promotes sustainability. Celebrate love while reducing waste with these creative, reusable gifts.
Fresh-baked treats are always a joy, yet they don't stay fresh for long. If you find yourself with too many baked goods after a baking session, freezing is a great way to keep them fresh for months. The method varies depending on the item. Silicone, durable and chemical-free, is ideal for storing these goodies. We'll show you how to use reusable silicone bags and containers to freeze baked goods well and tell you which ones freeze best.
Preparation Before Freezing
Essential steps before freezing baked goods include:
Cool Completely: Ensure baked items are at room temperature to prevent moisture build-up in the container.
Portion: For larger baked goods like cakes or bread, slicing them into smaller pieces facilitates easier defrosting.
Wrap: Use cling film or parchment paper to wrap the goods, then place them in silicone bags. This helps retain freshness and flavor.
How to Freeze Sandwich Bread and Burger Buns
Soft breads like sliced bread, burger buns, and hot dog buns last longer than hard breads. But they can still get moldy or stale. The good news is that they freeze well in gallon bags. Just make sure the bag is closed tight. For extra safety, put bakings in reusable freezer bags and keep them for up to 3 months. To thaw, leave them out on the kitchen counter.
How to Freeze Muffins and Scones
Freeze single-serving baked goods like muffins and scones using the same method as for bagels. Wrap them individually in cling film or place them in reusable sandwich bags. Group the wrapped items in a larger freezer bag for storage and freeze for up to 2 months. To reheat frozen muffins and scones, put them straight into the oven or toaster at 300℃ to 325℃ Fahrenheit. You don't need to thaw them first.
How to Freeze Bread
Wrap whole loaves (like farmer's bread or yeast bread) in cling film twice, then seal them in a large freezer bag. If you plan to use the bread for sandwiches or toast, slice it beforehand. This way, you can take out only what you need; the rest can be stored for up to 3 months. Thaw at room temperature to allow it to reabsorb the condensate formed in a Silicone bag.
How to Freeze Bagels
Fresh bagels are wonderful, but buying them in bulk is cost-effective. To maintain their freshness, slice the bagels in half before freezing. Wrap them tightly in cling film or store them in reusable sandwich bags, removing as much air as possible before sealing.
Defrosting Method
To defrost, move the silicone bags or containers from the freezer to the fridge. It usually takes a few hours to overnight to thaw slowly. Some items, like cakes or bread, can also be defrosted at room temperature for a few hours. Avoid defrosting in the microwave, as it may affect the texture and taste of the food.
Using silicone bags and containers to freezer baked goods is both a convenient and eco-friendly method. It not only helps reduce food waste but also ensures you can enjoy freshly baked delights at any time. Using the right methods, you can keep most baked items fresh for a long time.
Durbl Bags are the ultimate travel companion, offering eco-friendly, space-saving storage solutions. Their waterproof, moisture-proof, and reusable design keeps your belongings organized and dry. Perfect for clothing, electronics, and personal items, these bags enhance your travel experience by promoting a responsible way of traveling.
For healthy, on-the-go snacks, pack fruits, vegetable sticks, nuts, yogurt, and popcorn in reusable containers like durable silicone bags. These snacks are nutritious, eco-friendly, and easy to carry. Follow simple cleaning tips to keep your reusable snack bags fresh. Visit our FAQ page for more tips or contact us via email or Instagram for additional advice.
I was so angry I wanted to smash a bowl, but it wouldn't break, which didn't relieve my stress at all. In the end, I forgave my partner. I'm not really happy with the outcome, but at least the kid wasn't hurt. Thanks, durbl.
S
Fold-Flat Lunch Set (3-Pack) Sofia Harris
I’ve bought plenty of kitchen products that seemed useful at first and then ended up in a cabinet. These are different—I actually use them several times a week. Practical, easy to store, and really convenient.
C
Fold-Flat Lunch Set (3-Pack) Camila White
I used to carry glass containers to work and honestly got tired of the weight. These are much lighter and easier to carry while still feeling sturdy enough for everyday use.
H
Fold-Flat Lunch Set (3-Pack) Harper Thompson
I was a little nervous about carrying food with dressing in it, but so far I haven’t had any leaks. The lid feels secure and it’s become one of my go-to lunch containers.
L
Fold-Flat Lunch Set (3-Pack) Luna Jackson
One of the things I appreciate most is how easy these are to wash. Food doesn’t seem to get stuck in awkward corners, and they’ve held up really well in my dishwasher.